2nd United States Sharpshooters, Company D
  • Home
  • About
    • Meet Company D
  • Military Life
    • Uniforms and Gear
    • Drill and Tactics
  • Research Library
  • Civilian
  • Armory

Uniforms and Gear

Welcome to our uniforms and gear page.  These resources explain our gear and list articles and resources to improve your impression.  Texts in italics are straight from army regulations.

Source for period-style matches?

1/23/2022

1 Comment

 
     Most of us are familiar with the ubiquitous lucifers sold at sutlers, yet another style of matches was just as common during the 19th century: the sheet match.  There are excellent recreations of box style matches available to the reenactor, but the absence of the sheet match has long puzzled me.  I've had some originals in my collection for years and even pondering trying to recreate them.  Even to the point of weighing the dangerous option of trying to create a mixture for the match head.  I'm still glad I didn't pursue that idea.
     Well, due to climate change and increasing burn bans during the reenacting season, I admit I have been farbing out my food with a haversack full of foreign MREs.  At our last event last year, I was feasting on a German MRE and as I explored the accessory pack, I of course found a pack of matches to use for the stove.  At first, I didn't think anything of it.  As I waited for my food to heat, I flipped the top of the pack and was astonished to find someone is still making sheet matches!  I then stashed them in such a safe place in my gear, I practically lost them.
     Here they are, photographed in side by side for your consideration.  As you know, I am interested in diversity of gear represented in the hobby as much as I am about accuracy.  Diversifying you kit with a set of sheet matches might be something for you to consider.  Of course, they didn't come in the modern cardstock packs they do today but they are strikingly similar (pun intended).  The cover can also be easily discarded for increased authenticity.  You will see they vary in form in length and thickness but are otherwise the same with the benefit of being better constructed and more reliable, too.
     Whether they meet your historical requirements or not is up to you.  You could ask yourself, when was the last time you saw someone reach for and use a sheet match?  Now the tricky part of this is, I haven't found a direct source for these matches aside from the imported MRE which I purchased from MRE Mountain.  If you do find a source let us know our Facebook page.
1 Comment

Boat Soup and Old Shovel

8/3/2021

0 Comments

 
      Reenacting has taught me many things.  One of those has been an affection for pine tar.  From pine tar soap, Stockholm tar hand cream, and even a 19th century pine tar salve recipe I use for insect bites at events, I have been consistently impressed with this over looked super ingredient.  Recently we received a pine tar, boiled linseed oil, and turpentine axe handle oil in a survival subscription box we get.  My initial response was, "I'll be dipped!"
      I went in to research mode to figure out its history and if it had a name.  The only name that popped up frequently was found in wooden boat forums that referred to it as "boat soup."  There was lots of documentation of its use throughout history on wooden ships.  I did also see a couple of forum articles about long hunters who have used the mixture on the stocks of their Kentucky rifles.  I've read about pine tar for wood treatments in 19th century receipt books but never in this seemingly magical concoction.  Pine tar has long been respected for its wood protectant and preservative properties.  All I needed was a project to use this new-to-me wood finish.
     A couple of weeks ago, I was shocked to find this old D handle shovel for only 50 cents at a community yard sale.  I certainly didn't need another one but couldn't pass it up. I knew the paint would be a bit of pain to remove but appreciated that the paint likely did a lot over the years to preserve the wood and steel.  I eventually got the chance to begin the restoration process of removing paint and rust.  The handle was cracked, but they're almost always cracked.  Once everything was stripped down, I checked to see if the handle would clamp together.  It did but it was out of alignment.  I figured the old rivet was bent so I carefully removed it, straightened it, cleaned it and set it aside while I epoxied the handle back together.  Once the epoxy cured over night, I reinstalled the refurbished handle rivet and sanded the wood.  After that, I applied a liberal coating of Evaporust  gel on the spade to get any left behind rust before quickly sharpening the end of the shovel.  Once all the routine restoration work was complete, it was time to mix the "boat soup."
     Why did I decide that this finish would fit this shovel?  The paint remover worked well, but the pigment had settled into the grain of the wood.  I didn't want to remove all the wood necessary to get below the staining (minimally invasive) so I figured a darker finish would complement it.  Also, I figured that since Company D was from Maine, familiarity with pine tar would be an expression of a nice historical detail.  I will note however, Stockholm tar was preferred for ship rigging.  Stockholm tar is just a high grade of pine tar from Swedish pines.
    Since I only had a handle to oil, I mixed one tablespoon each of pine tar (available at most farm supply stores), boiled linseed oil, and turpentine.  I mixed thoroughly and applied like any other oil finish.
     I am very pleased with the result.  Not only do I think it looks great, adds improved water and insect protection, it's further proof of the soundness of historical practices.  As always, when working with boiled linseed oil be sure to safely dispose of your rags since they can spontaneously combust.
0 Comments

Making a Federal Haversack

1/12/2021

1 Comment

 
 UPDATED 1/31/21

     Well, pandemic boredom got the better of me again with this project.  Winter weather had me staying inside and I started wondering about what haven't we created a pattern for yet.  I did some digging around the ol' interwebs and realized how little was actually written about making Federal haversacks.  They are such a staple of reenacting, I was actually surprised.  I saw some reviews, historical essays, and several articles about people who had made their own but only a few crudely drawn schematics.  So, I thought I'd try recreating my favorite haversack and share with the community.  My haversack is from a quality vendor and having spent several days elbow deep in the haversack and the Quartermaster Manual, I was pleased to see how accurate my purchased haversack was.
     I will say, I'm no haversack historian.  This pattern is of my haversack, knowing there are many contract variants.  If you don't create this exact one, it should be a helpful guide as you navigate creating a pattern for your desired haversack.  There is certainly plenty of research you can do.  In these instructions, I've included the entire 1865 Quartermaster specifications for haversacks.  "American Military Equipage Vol. 1" could also be a valuable reference.  This particular pattern is for a single piece body construction.  In other words, only one side seam.  This posed some figuring out at times especially the bottom and the hem transition to the flap.  I would classify this as an intermediate sewing project.  A beginner could do it, but expect to refer to some YouTube sewing videos.  This haversack is nearly entirely handsewn.  The only exception being the long center strap seam.  Aside from the button holes, this bag only really uses running and felled whip stitches.  I admit, I'm not sure they're called felled whip stitches but it's what I call them.  They look like straight stitches perpendicular to the hem on one side and a diagonal whip on the other.  I suppose you could use backstitches for additional strength, I have a reference size of one, so I can't confirm authenticity on that.  I typically over-sew things and tend to backstitch everything for strength.  But, for this I stuck to reproducing it faithfully.  The no. 35 thread is pretty thick and I wouldn't be worried about durability with a good running stitch.
     I also want to call out that my pocket is bleached cotton twill.  I've had a difficult time getting hold of some fabrics because of the pandemic.  I'll continue to keep my eyes open for unbleached. Though, after a few uses, this bright white should dull pretty well.
     I hope this information is useful and maybe even fill up some of that pandemic free time.  I still consider this version a draft.  If I update it, I'll be sure to let you know.  Happy sewing!

DOWNLOAD FEDERAL HAVERSACK PATTERN
NEW! 5 FULL-SIZE PATTERN PIECES
1 Comment

Making Union Ground Cloths

1/1/2021

1 Comment

 
Picture
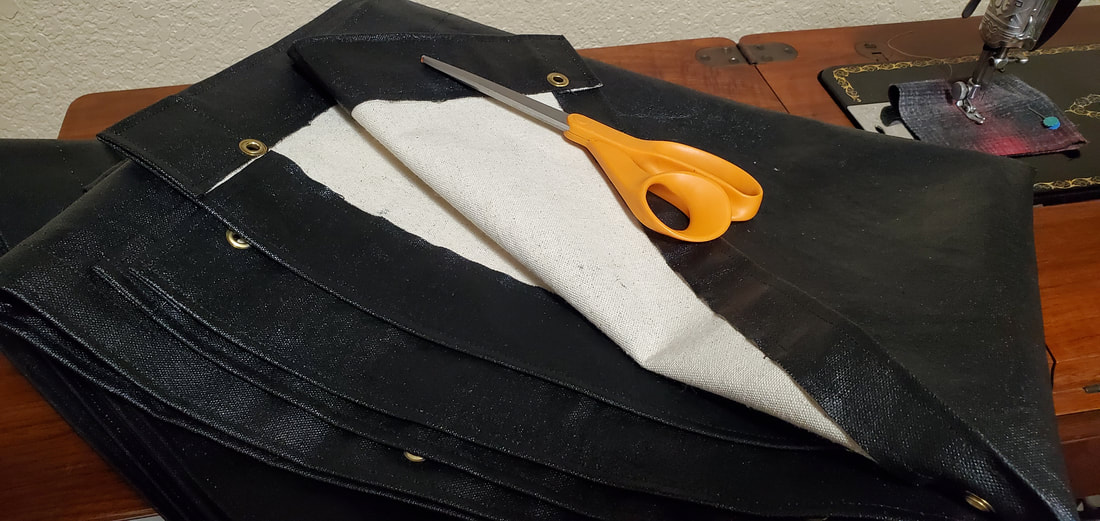
With so much time at home this pandemic, I thought I'd make a pattern for Union ground cloths to share with the community.  There are makers out there who make great quality cloths at reasonable prices and reasonable turn around time.  At Company D, though, we like to document things to keep this website a useful and applicable resource for reenactors.  Forums too often just list a regulation without ever actually explaining how to do anything.  This pattern is taken from several we have in the company and I used averages to dial it in.  I based it off of common cloths in our company because I wanted them to be compatible.  Use your own research and experience to modify or adapt the pattern and process to meet your unique needs.
​
Download the instructions:
​How to Make Union Ground Cloths 
1 Comment

Sanitary Commission Ration Bags

2/25/2020

1 Comment

 
If you've decided to take the awesome step of using your haversack for just food, these rations bags are a fantastic way to stay organized, your food fresher, and your haversack cleaner.  To accompany the video, we've added written instructions to help with any questions you might have.
  1. Click the below link to the period reference and create a full scale pattern.  I like card stock because once you make one, you'll want to make more.  I usually use for or five in my haversack.  They are the exact perfect fit for the hardtack I make, too.
  2. Make your painted cloth.  I use scrap cotton canvas or cotton drill left over from making shelter halves.  Cut your fabric blanks slightly larger than your pattern.  This will make handling while painting easier.  Coat your fabric first with wall paper size and let dry.  For a period prep, you can make a thick homemade starch.  Then apply two coats of latex paint.  I use semi-gloss black, but you can use gloss, or even try a different color.
  3. Once dry, use your pattern and cut your blanks.  I trace the pattern onto the unpainted side and cut by hand and with a rotary cutter and straight edge for the straight sides.
  4. Cut your binding.  The instructions don't specify a size, but I personally like the look of a finished 1" binding.  I use 100% cotton fabric and cut my binding the length of the template and just a little bit larger than 2 1/2" wide. This allows for 1/4" seam allowance.
  5. Attach the binding.  If you make the sack like I do in the video, then I iron a 1/4" seam allowance on each long side and then iron in half along the length.  Then, with right sides together, I sew one edge of the binding to the top of the sack.  I then fold it over the top and use a felling stitch to secure the inside of the binding to the inside of the sack.  However, it seems that during the war, the binding was top stitched on after the bag was assembled.  This left two unfinished and open ends with which to run the tap through the binding.  
  6. Stitch the bag with right sides (the painted sides) together.  I typically start with stitching the long side closed and finish up with sewing the bottom triangles together.  I use black cotton thread and increase my stitch length a bit.
  7. Carefully turn the bag inside out.
  8. Tape: If you make it like I do with a finished binding, cut two small slits (like tiny buttonholes) a little ways from the seam line.  Buttonhole stitch with linen or cotton thread.  The holes need to be large enough for the cotton tape you are using.  I use 1/4" cotton tape.  To run it through the binding, attach a small safety pin to the end of your tape and feed it through. If you are making it according to the instructions.  Top stitch your binding and feed your tape through the open ends.
  9. Fill with rations and cinch snugly.

I'm not sure how well these wash.  I keep dry goods in my sacks.  At our last bivouac, I kept oatmeal, peanuts, wild rice, cornmeal, and hardtack in mine.  I imagine if you kept salt pork or other meat in them, you could turn them inside out and hand wash and air dry after use.  

Resources:

Sanitary Commission Bulletin
Just the ration bag instructions
​Burnley and Trowbridge
​
1 Comment

"Original Recipe" Oil Cloth

7/3/2019

2 Comments

 
By 1st Sgt. Koepp

     I've been surprised at how few how-to's regarding oil cloth are out there.  It's not usually too hard to find various recipes, but hardly anyone walks you through the process.  Modern recipes that utilize latex paint, coated with a boiled linseed oil, turpentine, and japan dryer mix produce great results, but I wanted to see what could be done with a safer period recipe.  After lots of research in old books, manuals, and forums I settled on the trying the following recipe: equal parts linseed oil, turpentine, a tiny splash of Japan Dryer  and lamp black to taste.  I went with pure food-grade linseed oil (flax oil) to remove all the the toxins from modern boiled linseed oil found at hardware stores.  For turpentine, I also did my research and found the purest stuff I could find.  The pure turpentine I used is made traditionally from the proper Georgia pines.  You can find various pure turpentine suppliers online.  It was quite pricey compared to hardware store turpentine, though.  The lamp black, I already had on hand since I use it in japanning.  I did kind of wing it with the amount of lamp black I used.  I think I used too much, however, since I had excess lamp black dry on the surface of the oil cloth.  It wiped off easily, but I'd recommend testing as you mix.  One thing I'm learning about lamp black is that a little goes a long way.  The most notable ingredient missing from this "original" recipe is lead or litharge.  Obviously that's bad for you and lead mostly added durability to the finish and sometimes a bit of coloring depending on the type of lead used.  Lead salts were also common to act as drying agents for the linseed oil.
      To try it yourself, you'll need to treat the material you plan on painting first.  If you don't pre-treat the fabric, the paint will soak completely through the fabric. The most common way to do it is to wall paper sizing that you can buy online or at some hardware stores.  Cpt. Whitehall figured out he can use clear paint with the same effect.  If you want to try going old school with the pre-treatment, you'd want to use a heavy starch.  Whichever method you use, you'll need to paint it on the surface that you will later paint with the oil paint.  Let it hang dry completely.
     With the fabric treated, you're ready to apply the paint.  I was amazed at how thin the paint mixture was and how easily it applied.  I used a foam brush.  Once evenly applied, I hung it up to dry for a day.  I was also impressed at how quickly everything dried to the touch.  The next day, I applied a second coat and let it dry for another day.  The biggest thing I noticed about the "original" recipe was how matte the finish was compared to painted cloth.  Using modern latex paint is easier and safer (see Missouri Boot and Shoe's impressive write up on their website) but way more glossy than this recipe.
     With the fabric painted, I was ready to make it into a poke sack.  Almost every Civil War relic book I have has at least one image of an oilcloth/painted cloth poke sack.  It was noticeably more difficult to hand sew than plain drill or canvas.  My fingers got pretty black while sewing which I attribute to using too much lampblack.  I figure that once the oil dried, the excess lampblack dried on the surface.  It wasn't a big deal, since a damp cloth easily cleaned it up.  Speaking of cleaning, I read a lot of 19th and early 20th century guidebooks and in "Audel's Household Helps, Hints, and Receipts," they recommend:

To Brighten Oilcloths:  dissolve half an ounce of beeswax in a saucer of turpentine; rub on, then dry with flannel.
A dingy oilcloth may be brightened by washing it in clear water with a little borax dissolved in it; wipe it with a flannel cloth that you have dipped into milk and then wring as dry as possible. Soap should never be applied to oilcloths, nor, if it be desired to keep the color, should a scrubbing brush be used. Wash the oilcloth with a coarse sponge or a flannel dipped in tepid or clean cold water. Beeswax, with a very little turpentine, makes a fine polish, and will revive the colors of an oilcloth admirably.
Painted, oiled, and parquet floors, linoleum and oilcloth, are injured by scrubbing; wipe them with a cloth wet in borax- water and then with a dry one; milk on a cloth gives a good appearance to oilcloth.
Oilcloth must be wiped perfectly dry as it is washed. Use little soap and this in tepid water; change often. A good brush and a piece of dry flannel will make oilcloth look like new, especially if linseed oil or skim milk be well rubbed in after washing. If in addition to these precautions they are varnished annually they are almost indestructible.

     Finally, I must close on the usual safety precautions of using oxidizing oils like boiled or pure linseed oil.  Dispose of all rags safely.  Improper disposal can lead to spontaneous combustion.  This also applies to the item you make from the oil paint mix.  Make sure you allow to dry and cure thoroughly before storing.  When in doubt, let it hang or leave it out way longer than you think.
     This was another great historical experiment and I plan to keep using and refining this recipe moving forward.  
2 Comments

An Actual Japanning How-To? YES!

3/8/2019

8 Comments

 
​Recipe from Hand Tool Rescue
50% Turpentine
30% Asphaltum
20% Boiled Linseed Oil
My translated recipe to make 8 ounces
4 ounces Turpentine
2.4 ounces Asphaltum
1.6 ounces Boiled Linseed Oil
 
     As usual, I was shocked at how impossible it was to find an actual reproducible recipe.  Sure, 19th century manuals and reference books have various recipes but those recipes include archaic measuring systems and toxic additives.
     It wasn’t until one my favorite YouTube channels, Hand Tool Rescue, finally showed a working recipe that we had something usable.  I’d been researching this process for some time and am happy to report that this is a great recipe and is an easy to produce an incredibly durable period finish.
     So, what is japanning?  It’s a very old baked paint finish.  Think of it like an old-school powder coating finish.  It was so popular and durable that early Ford cars used the finish.  If you’ve ever picked up an antique painted tool that has survived the test of time, odds are it’s because the paint is japanning. 
     Japanning’s durability comes from the asphaltum which is dried, powdered tar.  You can buy it from a few art supply stores or Ebay. It is very dry, very fine, and easily makes a mess, so you’ll probably want to use gloves and a mask when mixing it.  The asphaltum dissolves in the turpentine over the course of about 24 hours. The baking process speeds up the curing and hardening process.
     Adding asphaltum to paint formulas was common throughout the 19th and early 20th century.  Japanning involves a baking process, though cold formulas also existed and were commonly used and recommended for exterior finishes and coating metal.  A modern cold recipe simply involves mixing a 50-50 ratio of asphaltum to a good spar varnish and allowing it to dissolve and mix thoroughly. Whatever the formula, the major protectant was asphaltum.
     Making the japanning mix is fairly simple, though you do want to try and be as precise as possible.  It can be tricky translating percentages into measurable amounts. This mix goes a long way so I didn’t want to make a ton of it.  This 8 ounce recipe should last you quite a while if all you do are small projects like buckles, tin cans, or an occasional hand plane.
     I used my postage scale to weigh the ingredients before adding them to a metal, pint-sized paint can I purchased from Home Depot.  Using mason jars are also common. I recommend using a plastic spoon to measure out the asphaltum carefully. Once all the ingredients are in the can, stir thoroughly, replace the lid, and allow to dissolve for at least 24 hours.  After the waiting period, stir very thoroughly again prior to application. I recommend using some form of degreaser like alcohol prior to application.
     This “paint” is odd.  It’s like paint but has a syrupy consistency.  Light coats and close observation are important on your first go.  Also, if this is your first time and you need to japan something important, practice on another item first.
     Once painted, it’s time to bake your pieces.  I chose to use a $20 Walmart toaster oven that is dedicated to shop-use only.  I don’t recommend doing this in your house or baking it in anything you cook your food in.  I did this in my shop and it smelled mostly like turpentine with the faintest hint of tar. 
​     There are some varying thoughts on bake times, but I baked for 1 hour at 250 degrees Fahrenheit, let it cool completely, then baked for another hour at 275-300F.  It’s ballpark in my case because a $20 Walmart toaster oven doesn’t have a precise temperature control. The important thing is to not bake it too hot. When round two is complete, take it out and let cool and finish curing.  This varies depending on climate and temperature. It’ll be dry to the touch pretty quickly thanks to the baking. However, for it to get it’s true rock-hard finish can take a bit of time. The finish is beautiful, glossy, glass smooth, and very black.    
     I want to close with a musing on curing times.  In case you don’t know, there is a pretty big difference sometimes between an item being dry and being cured.  Dry means it can be handled more or less but curing marks the completion of chemical processes in the products you were using.  Think about it like bread going stale. You can easily move and handle it fresh, but it’s soft and a swipe of hard butter could rip it easily.  If you leave it on the counter for a few days, it’ll get hard as hardtack. The bread going stale is kind of like the curing process.
     I see a lot of people in the hobby bemoan the time it takes for things like linseed oil to cure as if it’s some major life hassle.  I get it, we live in an a culture of instant gratification, but the people we research and portray didn’t. These recipes worked for them even with the “unbearable inconvenience” of curing times.  The recipes were familiar to them, they worked well, and their schedules were built around the realities of the products they used. It didn’t take “forever” to them, it simply took as long as it took.  Modern makers tend to feel they need to rush things. For me, dabbling in 19th century chemistry teaches me about period formulas and what the results are actually like.  They also teach me about the patience and timing of life of the people who once used them.  Remember, living history, is just as much about the process as it is the result.
     I hope you found this article helpful and please feel free to share it.  We just ask you let people know where you found it. Oh, and don’t forget this recipe contains boiled linseed oil so please dispose of your rags safely!

8 Comments

A Handy Silverware Pouch - Free Pattern

1/2/2019

2 Comments

 
By 1st Sgt. Koepp

     This silverware pouch is another handy beginning sewing project.  I don't know how common these were, but I have seen a couple originals.  These weren't issue items, but they are great for keeping your silverware organized and clean in between uses.  To make your own, download and print our FREE PATTERN.  This pattern has been designed to fit standard issue silverware but you can easily modify it to fit your particular needs.

Instructions:
  1. Print out and assemble our free pattern.
  2. Use the pattern to cut out your fabric.
  3. Starting on the top, hem the top edge.  You can press all of your hems or crease by hand depending on your fabric.
  4. Use the pattern for the bottom piece to help you snip the two cut marks to allow you hem the flap.
  5. Hem the edges of the flap and secure with a felling stitch.
  6. With the hems complete, pin the right sides together and sew with a 1/2" seam allowance.
  7. You can snip your corners on a 45 degree angle for a sharper corner.
  8. Turn inside out.
  9. Find where you want your button to go.
  10. Mark and stitch a buttonhole on the flap.
  11. Locate and sew on your button.
  12. Fill with your silverware.
2 Comments

Secret's Out...We're Making Knapsacks!

12/2/2018

14 Comments

 
By 1st Sgt. Koepp

     Being so well known for making just about everything, it was only a matter of time before we finally got around to this. Many of you know that the Captain and I have been up to a top secret project and now we're finally ready to let the world know: we're making Berdan knapsacks!  Cpt. Whitehall recently helped me with a purchase from a retiring reenactor. With it, we were surprised that he included his amazingly detailed research and build plans for a Berdan knapsack from Company C.  As you can imagine, we were blow away and began planning an intensive build weekend.  We both contributed a hefty initial investment to get the project off the ground.  The Cpt. was so excited, he got to building the straps as soon he got back from Tandy leather.  A couple of weeks later, he was in my shop for several long days figuring out the process.
     Each day, we started with coffee and contemplation before heading straight for the shop until we crashed each night.  We were surprised at how fairly straight forward the construction is.  While the Cpt. was cutting and stitching leather, I was building frames and cutting templates.  We got enough leather and wood cut for our initial batch and to build our skills.  Though, our first one came out way better than we expected.  Once back home, Cpt. settled in for the finishing work.  The last piece to complete the project were the custom machined finials that a wonderful fellow reenactor and machinist made for us.
     Our knapsacks, based on plans from an original, are quite a bit different from other reproductions.  Two areas that really stand out are weight and fit.  The Whitehall Koepp knapsacks are a good two pounds lighter and the back relief on these frames make an already comfortable pack even more comfy.
     The only thing left is to buy a mess kit for it.  Though, we have detailed blueprints to build them as soon as we can find a tin supplier.
14 Comments

Octagonal Tent Pole Bands

10/1/2018

1 Comment

 
By 1st Sgt. Koepp

     You asked for a completed product in the YouTube comments and so I put my mind to figuring out a common man approach to making the banded ends for Civil War tent poles.  I kept our video deliberately general since octagonal tent poles can be seen in numerous time periods.  I wasn't sure how these would have been made originally.  I imagine they could have been fitted on industrial lathes, with a fork staff plane, or maybe with a hollow auger and a spoke pointer.  I recently picked up and finished restoring a hollow auger but like the other build options, they're not all that accessible to most reenactors.  I will do a later post when I figure out a suitable period-correct and accessible method of making these.
     Is it 100% accurate?  No, but I find it a very reasonable compromise.  The ultimate decision is yours to make.  I do think this will up any tent impression affordably and with increased durability.  I took a few days to think of approaches to the galvanized bands until it dawned on me that the chain link fencing section of the hardware store could hold a fair solution.  I not only wanted a band that would not require removing too much wood but also sit nearly flush to the edges of the pole.  I found that a 1 3/8" coupler did the trick.  At only $2.98 each, a single coupler can provide two bands.  Without seeing an original, I have a suspicion the bands may have been wrapped, galvanized sheet iron.  If you have a photo of an original, please post it to our Facebook page.  That said, the subtle seam that could have existed could easily be missed, making this tubing compromise a fair one.  I cut the coupler to length on my metal bandsaw, though a hacksaw would do the same job.
     To fit the tube to the pole, I measured down 1 3/4 from the end and cut a knife wall around all 8 sides followed by using a chisel to make a v groove for a small saw kerf all the way around.  The corners of the octagon will require a slightly deeper cut.  This cut is important to prevent your future chisel work from running out of the piece.  With the prep taken care of, offer up your band to the end of the piece and carefully center it.  Using a pencil, trace the internal diameter onto the end of the pole to mark your final diameter.  Using a combination of a 3/4" chisel and a curved spoke shave, remove the waste.  The spoke shave was handy when I had grain working against me.  Use some sand paper to fine tune the final fit.  Using a mallet, I set the band in place and trued the end on my disc sander.  I then cut some 3/8" metal rod, drilled the proper depth hole, and drove it in.  Since common lumber sizes vary from the Civil War to the modern day, the 2x2 pole is naturally too small for the required 1" screws.  I found two standard screws that would fit and not hit the "spindle."  I didn't have any galvanized rod in my shop, but if you have access to some, you can certainly use that instead.  The rod is hidden inside the ridge, so I'm not inclined to sweat it too much.  I used an automatic punch and then drilled two holes for the screws 3/8" of an inch from each end of the band.
     The final result fits great with the modern 2x stock that makes up 99% of reenacting tent ridge poles. If you plan on milling your own, regulation size, wooden frame pieces you can certainly modify the techniques and materials to your needs.  The regulation shown is for a "common" or small wall tent, but would work in other areas that require similar configurations.
     As always, thanks for watching our videos and posting your great questions and comments to our videos.  I hope this provides an accessible solution for those of you looking to improve the appearance of your tenting impressions.
1 Comment
<<Previous

    2nd USSS, Co. D

    Contact:
    Captain Ethan Whitehall:
    ethanbugs17@gmail.com

    ​Vendors:
    NJ Sekela
    Wambaugh & White
    Regimental Quartermaster
    Townsends

    Dell's Leather Works

    Gun Parts:
    VTI gun parts
    Flintlocks, Etc.
    ​Taylor's & Company


    Firearms Dealers:
    Gun Broker
    Dixie Gun Works

    Other Links:
    Washington Civil War Association
    Happy Friends of Civil War Farb
    Company C Berdan Sharpshooters

    Historically Speaking

    New Recruits:
    WCWA Safety Test


    Other Resources:
    Company D Standing Orders
    Company D Drill Guide
    Berdan Brochure

    Officer Responsibilities

    Handy Reenacting Forms
    Form 4. Accouterments Inventory
    Form 5. Camp and Garrison Equipage 
    2nd USSS Inventory Receipt 

    Archives

    January 2022
    August 2021
    January 2021
    February 2020
    July 2019
    March 2019
    January 2019
    December 2018
    October 2018
    September 2018
    August 2018
    April 2018
    March 2018
    February 2018
    January 2018
    December 2017
    September 2017
    May 2017
    March 2017
    October 2016
    August 2016
    June 2016
    June 2015
    March 2015
    August 2014

    RSS Feed

Proudly powered by Weebly