2nd United States Sharpshooters, Company D
  • Home
  • About
    • Meet Company D
  • Military Life
    • Uniforms and Gear
    • Drill and Tactics
  • Research Library
  • Civilian
  • Armory

Welcome to the Co. D Armory

Here you will find all things firearms related.

Recreating the Sharps Cleaning Brush

8/1/2020

1 Comment

 
     This project has been on my to do list for awhile but it wasn't until I was browsing one of my favorite stores that I saw a CVA breech brush kit on clearance for only $3 that I found what I was looking for.  This experiment/prototype isn't an exact replica but does look the part.  The biggest trouble with recreating the original is that the brush is made from boar hair.  As you can imagine, no one is selling boar hair rifle brushes these days.  The closest in appearance and most readily available is nylon.  I just hope to find a brass twisted nylon brush some day.  Instead, typically you'll find aluminum twisted nylon like these CVA brushes.
    There are lots of different ways to go about recreating this.  For my Mark I, Mod 0 prototype, I took inspiration from modern brush construction.  The original brush was made specifically for this application.  You can see the end of the brush on the ferrule appears to be a loop fit into a slit in the fitting.  So, clearly, these were tooled up and manufactured for a specific construction method.  I had to take a different approach.
     Using 1/4" brass stock that I already use to recreate the pull through cleaners, I took measurements off of my original to approximate the size.  The overall length of the piece is 13/16".  The threads are 10-32 to match common rifle cleaning kits.  In order to make 10-32 threads, I had to turn down 1/4" of the OAL to 3/16".  I did this on my woodworking lathe with some junk turning chisels and files.  Once the thread diameter was turned, I rotated the piece and bored a 5/16" hole 3/8" deep to receive the brush diameter.  In order to get good results, I began the process with a center bit and worked my way up three drill sizes using tapping oil.  How do I turn something so small in a woodworking lathe?  I have two Jacob's chucks.  I place one in the tail and head stock.  Once, the lathe work is done, I tap the threads.  In order to tap as far down as I can, I turn the tap around for a final pass.  
     Once the ferrule is complete, I thought about how to secure the brush.  At first, I considered some 1hr epoxy.  I settled on soldering the brush into the ferrule.  Setting the ferrule into my vice, I added flux to the hole and the brush wire before heating the ferrule with a small torch.  Once heated, I filled the hole about half way with solder before quickly inserting the brush and holding it vertical while it cooled.  Finishing included a quick polish on a buffing wheel and it was good to go.  It fits great into the bore of my 1859 Sharps.
     Before I wrap up, I have one last note about the modern brush I used.  As you can see in the photos, the CVA brush is shorter than my original.  In a previous post, I refer to documentation on how the brush length varied in known in examples.  The goal with the model was not to replicate exactly the original to but give the impression of the original where one can see just how large original brushes were.  Don't worry about me settling for something less than perfect, though.  As I find new materials, I'll be adapting this prototype.  Maybe you have access to more accurate materials and this post could help inspire your own recreation.
1 Comment

Make a Wooden Sharps Rifle!

6/19/2020

1 Comment

 
Picture
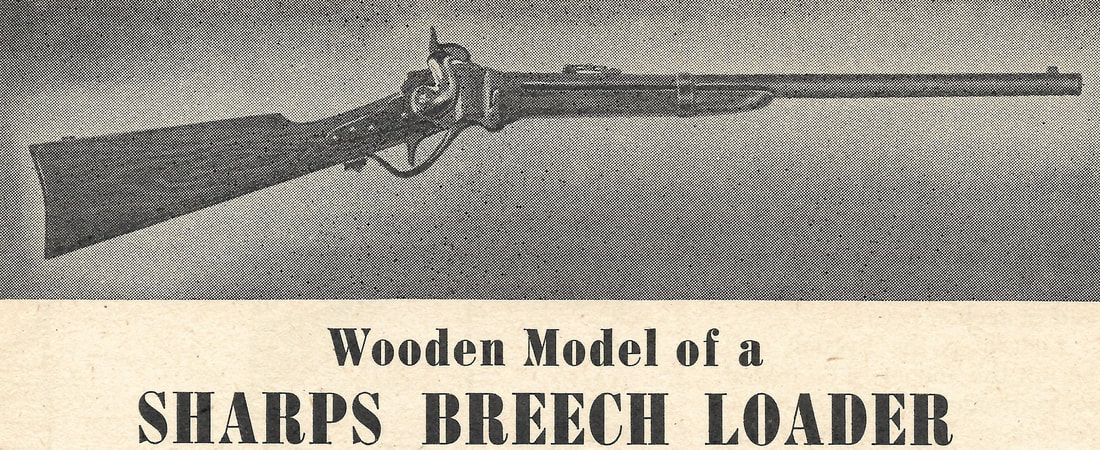
I recently found a new treasure on Ebay recently and wanted to share it with you all.  Up late one evening, I was scrolling through Ebay, as I often do, and found this article for sale.  This article, written by Carl Erich, comes from the August 1946 issue of Popular Science.  It was only seven dollars, so I couldn't resist.  As is common with these old how-to's, they're really short on instructions.  Yes, this is the entire the article.  There really is only one paragraph of instructions.  This could be just the project for someone running out of things to do during quarantine.  The links below will open the .pdf of each page.

Pg. 156
Pg. 157
1 Comment

Original 1859 Sharps Cleaning Kit

1/11/2020

3 Comments

 
     ​After quite a long time of searching I finally found a complete and original 1859 Sharps cleaning kit.  This set I purchased from a very reputable antique militaria dealer who also added to my education of these unique and little known of cleaning kits.  I was additionally surprised to find that this kit is just about new old stock.
     Ever since I began reenacting, I had lots of curiosity of about how the Berdans cleaned their rifles.  Aside from a few references in their diaries, little was written of.  Matthews only mentioned that at one inspection, Col Berdan found their rifles so dirty he threatened to take them away.  Wyman White only mentioned tending to his target rifle.  Various manuals shed only slightly more light.  Sharps were shipped ten to the case with one cleaning or “garrison” rod per case.  Other sources, like the great reference, “Gun Tools: Their History and Identification” tends to focus heavily on carbines.  I have read varying accounts about which rifle used the double thong brush or the single thong brush.  The predominance of research I have reviewed tends to lean towards the single thong brush used for the 1859 infantry/Berdan sharps.  The double thong being more likely used for the carbines.  The removable brush on the single thong allows it to be used with the garrison rod.  The double thong brush was pinned into place and non-removable.
     Additional research and conversations I’ve had with knowledgeable experts say the same system was used for Spencer rifles, too, though I don’t have a definitive citation to share.  Rather, I wanted to share that it is a thought floating out there.  The overlap of use continues post war with many of these being used on numerous other rifles.
     So, how would I go about recreating these items?  I was pretty close with my first version that I wrote about in a previous article.  The photos above show exact measurements, though I think that level of precision may be a bit unnecessary.  Especially since there seemed to be various manufacturers of these kits.  Thong length varies anywhere from 29 – 39” or more in extant examples.  The short ones being most likely for carbines.  Brush color varies between light colored boar hair and dark colored boar hair.  Most surprising for me was just how long the original brushes are compared to modern ones.  My brush is 4” long and roughly 5” over all.  I think with some cleaver tinkering you could probably modify a similar diameter nylon cleaning brush.  Nylon of course, not being period correct but passes pretty well.  You can also get brass cleaning brushes on Amazon. The thread pitch appears to be 1/4 x 24, though I’ll continue making the parts to accept modern commonly available gun brush pitches. 
     Thong:  The thong measures about 11/64” in diameter which is still pretty close to the 4mm leather thong I currently use in my recreations.  The thong ferrule comes in at .286 in diameter, so I would probably increase my brass rod diameter to ¼”.  The length of the thong ferrule is .762, so I’d probably cut it at ¾”.  It appears to be tapped all the way through with the thing being inserted 3/8” and pinned into place with a 1/16” steel rod inserted 3/16” from the base.  My thong is 35” long.
     Garrison Rod: The rod appears to be made of simple pine and is about 7/16” in diameter as is the 1” long brass ferrule.  Civil War issues, like this one, have a nicely crowned end.  The ferrule is attached to the end of the rod with a 3/32” steel pin 7/32” up from the base.  The end of the rod is turned down slightly so the ferrule can slide on prior to pinning.  Looking carefully inside, you can see the indentation from the dead center of the lathe.
     The rest of the photos should answer any additional questions you might have.  If you have any questions about this particular set, feel free to leave a comment below.  For lots more information about these cleaning systems be sure to check out “Gun Tools: Their History and Identification.”
3 Comments

Recreating Linen Sharps Rounds

11/18/2019

5 Comments

 
By 1st Sgt. Koepp 
     The mysterious, yet famous, linen Sharps round is now much less mysterious.  It still surprises me how well known some things can be in our hobby yet are still unexplored.  This was yet another foray into “experimental archaeology” that I had long wanted to explore but I had a few missing links in documentation.  It’s odd how nearly every other method of shooting an NM1859 Sharps is written about on forums, websites, and even YouTube, but the linen cartridge has always been only tangentially mentioned. 
      Then, I happened to have a Mark Hubbs video pop up in my YouTube feed.  I’m not much of a historical pistol cartridge reloader, though I have dabbled.  I do, however, enjoy watching videos of arcane cartridge construction.  I kept watching because he gives great instructions and he often referenced documentation.  That always gets serious respect from Co. D.  One reference he consistently referenced was “Round Ball to Rimfire” by Dean Thomas.  I opened up my Amazon app and saw a complete volume (Part 2) just on Federal breechloading carbines and rifles.  I paused momentarily at the high price of the book, but purchased it anyway.
      Upon arrival, I was instantly blown away by the depth of information on Sharps cartridges and the massive number of primary sources shared in the book.  He classified about a dozen different types of arsenal packs, and even more cataloged examples of different cartridges.  For example, one arsenal pack apparently came in blue and white checker wrapping.  After pouring over letters from the Sharps Rifle Manufacturing Co, the Ordnance Department, and various arsenals I saw it and my jaw dropped!  For the longest time, I wondered how linen could be durable enough to bear the heavy Sharps bullet but there, in black and white was the most obvious answer: sizing.  There are several references to sizing the linen and even a complaint about a batch of faulty rounds because they were not properly sized.  Before we get into details lets talk about why linen was so popular.
      Paper cartridges, like shown in our YouTube video, did exist and were issued for the NM1859 yet the commonly complained about fault was how the bullet lubricant would weaken the paper over time and cause the cartridge to fall apart during shipping or while in a cartridge box.  This was especially true in higher temperatures or high humidity.  The Sharps Rifle Manufacturing Co. consistently had the highest quality of cartridges, being well made and of linen.  However, various arsenals and the Ordnance Department were well aware of their hustle to make as much money off the government as possible.  Several letters in the book illustrate this concern.  However, in an effort to maintain their government contract, they had an agent, George H. Penfield write to General Dyer on January 20, 1865.  The intent of the letter was to itemize the cost of materials in making 1000 Sharps cartridges.
  • 70lbs lead 16c
  • 9lbs Powder 35 ½
  • 5 ½ Linen 80
  • 100 paper boxes
  • Wax and tallow
  • Varnish
  • Bank note paper
  • Gum and paste
  • And more…
     Now that I knew all I had to do was size the linen like I would painted cloth, I needed to source some linen.  Without getting into the massive complexity of arguing about historic linen weaves, I knew a great place to start sourcing accurate linen would be Burnley & Trowbridge.  Within a few days, I had my linen order and went to coating a workable portion of it with Zinsser’s Wall Paper Size and let it dry.  Now, assuredly, someone reading this might be thinking, “1st Sgt, they didn’t have Zinsser’s Wall Paper Sizing during the Civil War.”  Right you are.  If your personality tends towards intense historical accuracy, you can experiment with period starch-based sizing formulas. Once dry, it took on the characteristics of paper and I cut it into the same size as my paper cartridges. I experimented with a second coat of sizing and while it filled the weave more than one coat, light was still visible.  It did become stiffer, but not too much more so.  So, depending on your research you may find room to experiment with the number of coats.  You can also experiment with different types of linen. Be sure to check out our Sharps Paper Cartridges 101 video below for more details on construction.  Everything assembled almost exactly as the paper rounds but with the authenticity of a linen round.  One thing I will try in the near future is modifying my cartridge measurements to accommodate 65 grains of FFg black powder.  Several letters cited in the book preferred the 65 grain load as it most closely shot true to the sights on the rifle.
     For those of you not particularly familiar with the intricacies of Sharps cartridge construction, I’ll explain a bit more about the above materials list from 1865.  The tallow and beeswax refers to the bullet lubricant.  The bullets would have been dipped into this mixture.  The varnish can refer to varnishing the labels and varnishing the arsenal packs for additional weather protection.  Bank note paper was used for the paper base of the bullet.  Today, we use tissue paper, but if you are of the inquiring type, an original bank note I have from the State of Maine comes in at about .002” thick.  For comparison, modern tissue is about .001 thick.  I would take these measurements as approximate since it was very cold in my shop today and it tends to make my caliper a bit finicky. 
     Another thing that really stood out to me about cartridge manufacture was a patent shared in the book for the 1865 J.S. Adams Sharps cartridge “choker.” Apparently, there were some complaints about the quality of attachment between the paper/linen cartridge and the bullet.  This issue actually led one arsenal to put girls on the bullet assembly line and move the boys from that role to another in cartridge construction.  Adam’s choker existed apparently in very small numbers in the various arsenals to ensure proper bond between cartridge and bullet.
     Lastly, in all the research provided in the book, there is not one reference to nitrated papers for the Sharps.  I know some black powder shooters take pride in nitrating Sharps rounds, but nowhere in original documentation was I able to find a mention of it.  I just thought I'd share that insight.
     So, it all comes down to some wallpaper sizing.  This article is by no means meant to be a definitive guide but I hope sharing these resources your own further research and development. Now all I have to do is take some to the range and try them out.  If you are curious about learning more, I highly recommend you pick up this book as it goes in to much more detail than this brief article.
      I will close with the usual disclaimers: this is for informational use only and is in no way a recommendation but is shared for informational purposes only.  Any re-creation and use is done at your own risk.


5 Comments

An Arsenal Pack For Live Rounds

8/3/2018

4 Comments

 
By 1st Sgt. Koepp

     This year, several of us ordered the last batch ever of Cary Davisson's Berdan cartridge boxes and with them came cartridge tins from Ulrich.  Obviously, the tins from Ulrich are superior in build quality and accuracy than import tins that most people have.  This increased accuracy opened up the possibility of experimenting with different boxes for arsenal packs.  That, and our first article and video on making arsenal packs has seemed to have sold out Michael's nationwide of the jewelry boxes we were using.  The first arsenal packs we designed, lets call them the Mark 1, were perfect for our needs because they fit all makes of cartridge tins and blanks take up much less space.  Since our original jewelry boxes appear to be hard to come by these days, the Captain ordered a different variety off of Amazon.  They, too were bigger than the Michael's boxes, but more accurately filled our 1000 round cartridge boxes.  The wooden cartridge boxes when loaded with the Amazon box arsenal packs holds about 1,040 rounds.
     With a growing interest in live firing in our unit, I've been scratching my head about how to hold the style of live rounds I make.  Today, I tried out a new box size (also from Michael's) and have been very pleased with how they fit in my Ulrich tins.  With 10 rounds and 12 caps it's a snug fit but fits the cartridge tin beautifully.  These Mark 1* boxes can be loaded, fully sealed with a wrapper and a rip string and coated in shellac for a truly period experience at the range.  This style will almost certainly not fit any import cartridge tins.  I will also say, this current style of flat based rounds I'm using doesn't fit the wooden inserts inside the tins.  If you changed glue location from the base ring to the ring tail (or choke the cartridge on the ring tail like some originals) they should fit fine.
     Comparing the fit of the 10 rounds and 12 caps in our Mark 1* model looks very similar to photos of originals.  For full construction details be sure to check out our how-to video.
4 Comments

The Overlooked 1859 Sharps Manual

1/14/2018

1 Comment

 
Picture
     Whether reenacting or black powder forums the Sharps' Patent Breech-Loading and Self-Priming Rifle, Carbine and Shot-Gun manual of 1859 is often overlooked entirely.  What better resource can there be then the actual Sharps' Rifle Manufacturing Company? Of course, when operating modern reproductions you should follow your manufacturer's instructions for safe use and operation.
     Reprints of this can be affordably purchased on Ebay.  This manual is full of reviews from trials as well as suggestion for use from the company.  I wanted to highlight a few useful points from this manual for you.  The below text is directly from the guide.

To clean the arm, relieve the lever key from pressure, by throwing down the lever guard, and then take out the key, which is replaced, with the guard in the same position.  Remove the slide and dissolve the hard substance with water if any has collected in its cavity, taking care not to use any metallic tool in the operation, by which the slide, or gas-ring, might be injured.  The bore is easily washed, or cleansed with a wet brush, after which, wipe it dry, and oil it, and the slide with sperm oil, tallow, or other pure oil, free from salt and acids.

Author's note:  Good luck finding Sperm Oil these days.  This was a common lubricant for firearms and machinery and is found in military manuals at least into WWI.  Tallow, however, is much easier to find.  I actually have a can of McQueen's Pure Mutton Tallow, and you can find it on places like Amazon.  Just follow the link.  I haven't used tallow on my Sharps or any other firearm for that matter.

In Loading Sharps' Guns, clasp the arm in front of the lock with the left hand, throw down the lever guard with the right, and insert the cartridge with the same, pressing it forcibly into seat in the bore; then draw the lever smartly to its position, thus cutting the end of the cartridge.  Incline the arm to the right or left to throw off the superfluous powder from the groove on the top of the slide.  Let the hammer remain down while loading, and never open the breech whilst the arm is loaded, without dropping the muzzle, so as to bring the barrel to a vertical position.

The Proper charge for Army Rifles and Carbines is 55 to 60 grains of powder of 300 yards eprouvette range; and cartridges are used for convenience and celerity in firing.

Author's Note: Not everyone knows that you can use the Sharps rifle with loose ammunition.  It's mentioned in the manual:

In using loose ammunition the barrel must be held vertically, with the muzzle down, the ball is inserted and forced to its seat with a short rod, and the powder charge is poured upon it, and the slide closed.  In all firings without patches, the balls must be coated with tallow, to prevent the bore from leading. (Italics original)

Interesting note on cartridge construction:

Cartridges made of the exact length of the chamber, having their ends closed with thin muslin or gauze, are preferred by some.  Such cartridges are not cut off; the fire of the primes penetrating the cartridge through its rear end.
--END--

This is the first time I've read of gauze as a possible cartridge material.  It's probably something I'll be trying in the near future.  This goes to show, that original source material is out there.  As living historians, we don't always have to rely solely on war accounts for our information.  I hope this research is helpful to you.


1 Comment

Original Prices of Sharps Rifle Parts

5/22/2017

1 Comment

 
This price sheet is transcribed from Kautz's The Company Clerk.
1 Comment

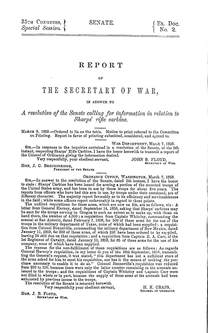
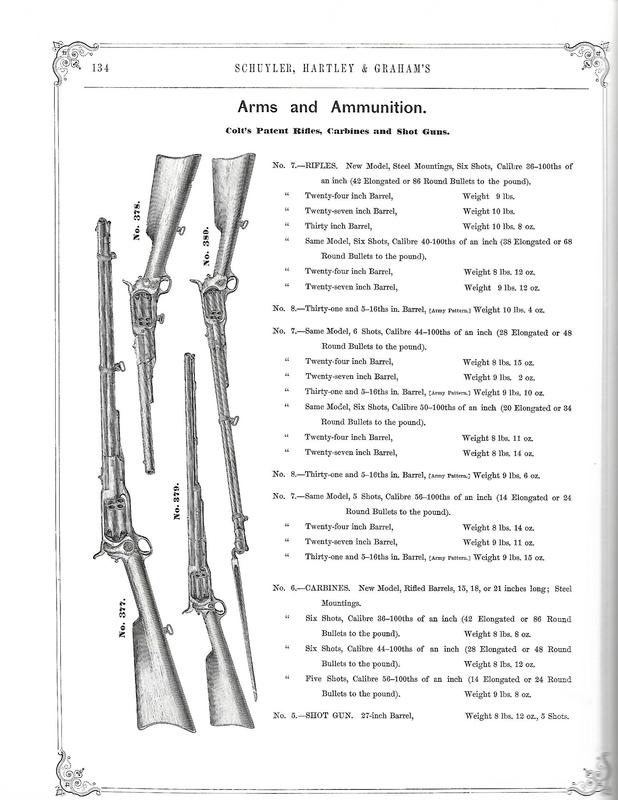
Colt Revolving Rifle Advertisement - 1864

5/15/2017

2 Comments

 
Picture
2 Comments

Sharps Ammo Box Cleaning Kit Conversion

5/10/2017

2 Comments

 
By 1st Sgt. Koepp   
    
     This project came about because we now have a company cleaning kit and as 1st Sgt, I no longer have to carry every item in bulk or tools for every repair contingency in the company.  The most practical way for me to carry all of my field gear in the past was to tote around a super-farby range box which came out after the event closed for the day.  I have been looking for some time for original examples of Sharps cartridge boxes with little to no luck except for a Richmond Arsenal example.  In all the manuals I have researched, I haven't found any references to anything other than generic dimensions for ammo boxes.  The Skipper found some info that really helped to get me started.  I found the perfect stencil font in Microsoft Word surprisingly and used Publisher to match my line spacing to original non-Sharps ammo box stenciling.  I've included the .pdf for the stencil for free download at the end of this article because at Company D, we're all about sharing resources.  If any readers have photos or references to original Sharps boxes, please leave a comment or email us.  Keep in mind, like many boxes in our hobby, this one is designed to hide farb.  I went hardcore on the case construction that people will see and sought convenience and the appearance of correctness on the inside.
    Box Construction:
     This starts out as a standard issue ammo box with finished dimensions of 7 7/8 x 12 1/4 x 16 1/4.  I used 3/4" 1x8 pine. For detailed instructions check out A.J. Hammler's Civil War Woodworking Vol. 1.  It's joined with finger joints and 1 3/4 cut box nails from Tremont Nail Company.  I used a Lee-Nielsen tongue and groove plane to join the top and bottom of the box.  When making a box, I like to leave my lids about 1/16" or less over sized on all sides for ease of access and a little more rain protection.
     I added a till or tray in the inside of the box that rests on 1/4 by 1/4 walnut rails glued in place with some TiteBond 2.  Any wood would work but I try to diversify the varieties as much as I can.  The till is designed to fit my personal kit needs and has final dimensions of 2 1/4 x 6 x 14 9/16.  The bottom is 1/8 plywood glued and tacked on.  As a woodworker, I avoid plywood in almost everything except drawer bottoms.  The stock is 3/8 pine though I needed a bit extra and I used a bit of 3/8 poplar because it was handy.  I then used some Helmsman Spar Urethane spray to make clean up and maintenance a lot easier.  The till is slightly less than half the width of the box so I can easily slide it back and forth to reach the bottom contents without removing the till.
     Finishing includes sanding up to 150 grit though 100 grit is fine since this is being painted.  I always start painting with at least one coat of Kilz primer.  Painting bare pine means you usually have to double the amount of finish coats since the wood absorbs the first two coats.  It's a little extra work, but totally worth taking the time to prime your work.  For top coat, I'm currently using Lowe's Olympic "All About Olive" flat exterior latex.  It's not as dark as I would like, but is currently the best I can find where I'm at.  Once the paint dries, I stencil the sides with basic craft store white acrylic paint and a foam brush.  Once that's done, I drill and countersink holes on the lid where the lid screws would have been if this was an actual issued cartridge box.  The last bit I add is I stencil my regiment, company, and line number identification on the box to identify it as mine.  Personal stenciling is so over looked in this hobby it's incredible.  Every manual says each company should have it's own stenciling kit for marking their equipment.  It would have been readily available and no one wants their stuff stolen.  To show the impact the screw holes and stencil make, I added it as a before and after in the slide show.  The inside Watervliet stencil came from Hammler's book.  Watervliet was actually producing Sharps rounds in 1862.
     For interior box finishing, I used Old Master's water-based spar urethane in semi-gloss applied with a foam brush.  I applied one coat, let dry, then sanded gently with some 000 steel wool before cleaning and applying a second coat.  Again, not period correct but we all know how dirty cleaning kits can get.  If you want period correct you can use shellac or just use BLO.  If you use shellac I would recommend at least 3 or 4 coats to build up a good layer of protection.  Hammler also mentions research that boxes were lined with a packing paper.  Though, through time none seem to remain with the originals
     If you've heard me rattle on about fasteners on our YouTube channel, you might notice these pictures have Phillips head screws on the mortised hinges.  They won't be there for long.  I have to drive quite a ways to my hardware store to find the slotted screws I need so they'll be on this weekend.
civilwarstencil.pdf
File Size: 99 kb
File Type: pdf
Download File

2 Comments

The Essential Sharps Cleaning Kit

6/29/2015

3 Comments

 
PictureClean Sharps Expected. Awesome mustache optional.
In Company D, we work hard towards historical authenticity but when it comes to rifle care we use all modern rifle care can give us.  If our rifles only cost $42 as they did in 1861 then it might be easier to use period tools and methods only.  Unfortunately, they cost much more than that and we care for our investments as best as possible.

Cleaning Kit suggestions and reviews:

Cleaning Rod, Jag, Brush, bore guide, and swab: My personal preference is Kleen Bore.  If you use a shotgun Kleen Bore kit, a 28 gauge brush fits nicely into the .54 cal Sharps.
Bore Butter: Seasons and lubricates all your metal.
Ballistol:  When it comes to cleaning black powder rifles this cleaning agent is nothing short of amazing.  If you buy one solvent for your kit, buy Ballistol.
Hydrogen Peroxide: This inexpensive cleaner eats black powder from the hardest to reach places.  I like to soak my block in it after a reenactment.  Caution:  Use before you season the metal.  Hydrogen peroxide will speed up rusting if left untreated.
Blue Wonder:  This is my favorite gun cleaning product.  This removes rust instantly!
Q Tips: Great for cleaning bolt holes and other hard to reach places.
Pipe Cleaners:  Another tool for getting hard to reach places.  My favorite are the ones with metal bristles.
Metal picks: Digging build up out of blocks.
Dental picks: For the hard to reach places.
Welding files : Great for getting build up off of cones.
 
Remington Oil or  Mineral Oil:  Many of you use rifle socks rather than hard cases and routinely suffer from surface rust.  For long term storage or exposure to the environment spray liberally with a protective oil prior to long term storage.  Not recommended for immediate use as too much oil will cause excess fouling or dampen powder.
Anti-Seize: Keeps bolt threads from rusting solid.
Phosphor Bronze  Brush: Use carefully to remove tough build up.
Super Lube:  Not all lubricants are the same!  Petroleum based lubes will seize a block quickly.  The thinnest layer of Super Lube will provide a smooth, non-fouling lubrication to blocks.
Wheeler Gunsmith Screwdriver Set: Only about $35 this kit will prevent damage to screw heads.  Proper screwdriver size is too often overlooked.  While you may not have the money for a gunsmith kit, inexpensive multi-bit sets are also available. 
T/C Foaming Bore Cleaner: This product works quite well for a good field clean but does not work equally well on all Sharps rifles.
Can of Compressed Air:  You can find these in just about every electronics section.  I like the small ones from Office Depot the best mostly because they don't take up as much space as the big ones you often find.  These are indispensable for blasting blockages or residue out of your block.  Give it a try you'll be amazed!

Other notes:


  1. Always boil your rifle barrel and block for proper seasoning and smooth action.  DO NOT USE COLD WATER.  Boiling water dries immediately and opens the pores of the metal to absorb the bore butter for a deep and long lasting seasoning.  If you can hold your barrel with a bare hand it is not hot enough!
  2. Always, always, always fully breakdown your block and especially remove your clean out screw.
  3. Did you know your gas check tube should slide freely?
  4. Does your rifle have a worn or missing part? Replace it now!  Call or visit VTI Gun Parts.
  5. Don't be afraid to do a complete breakdown and thorough cleaning at home.
  6. Use an air compressor or CO2 blaster to clean oil and lubricants out of your block after cleaning.


3 Comments
<<Previous
    Useful Files and Links

    Template Sheet for 1859 Live Rounds from original manual.
Proudly powered by Weebly