2nd United States Sharpshooters, Company D
  • Home
  • About
    • Meet Company D
  • Military Life
    • Uniforms and Gear
    • Drill and Tactics
  • Research Library
  • Civilian
  • Armory

Welcome to the Co. D Armory

Here you will find all things firearms related.

Sharps Ammo Box Cleaning Kit Conversion

5/10/2017

2 Comments

 
By 1st Sgt. Koepp   
    
     This project came about because we now have a company cleaning kit and as 1st Sgt, I no longer have to carry every item in bulk or tools for every repair contingency in the company.  The most practical way for me to carry all of my field gear in the past was to tote around a super-farby range box which came out after the event closed for the day.  I have been looking for some time for original examples of Sharps cartridge boxes with little to no luck except for a Richmond Arsenal example.  In all the manuals I have researched, I haven't found any references to anything other than generic dimensions for ammo boxes.  The Skipper found some info that really helped to get me started.  I found the perfect stencil font in Microsoft Word surprisingly and used Publisher to match my line spacing to original non-Sharps ammo box stenciling.  I've included the .pdf for the stencil for free download at the end of this article because at Company D, we're all about sharing resources.  If any readers have photos or references to original Sharps boxes, please leave a comment or email us.  Keep in mind, like many boxes in our hobby, this one is designed to hide farb.  I went hardcore on the case construction that people will see and sought convenience and the appearance of correctness on the inside.
    Box Construction:
     This starts out as a standard issue ammo box with finished dimensions of 7 7/8 x 12 1/4 x 16 1/4.  I used 3/4" 1x8 pine. For detailed instructions check out A.J. Hammler's Civil War Woodworking Vol. 1.  It's joined with finger joints and 1 3/4 cut box nails from Tremont Nail Company.  I used a Lee-Nielsen tongue and groove plane to join the top and bottom of the box.  When making a box, I like to leave my lids about 1/16" or less over sized on all sides for ease of access and a little more rain protection.
     I added a till or tray in the inside of the box that rests on 1/4 by 1/4 walnut rails glued in place with some TiteBond 2.  Any wood would work but I try to diversify the varieties as much as I can.  The till is designed to fit my personal kit needs and has final dimensions of 2 1/4 x 6 x 14 9/16.  The bottom is 1/8 plywood glued and tacked on.  As a woodworker, I avoid plywood in almost everything except drawer bottoms.  The stock is 3/8 pine though I needed a bit extra and I used a bit of 3/8 poplar because it was handy.  I then used some Helmsman Spar Urethane spray to make clean up and maintenance a lot easier.  The till is slightly less than half the width of the box so I can easily slide it back and forth to reach the bottom contents without removing the till.
     Finishing includes sanding up to 150 grit though 100 grit is fine since this is being painted.  I always start painting with at least one coat of Kilz primer.  Painting bare pine means you usually have to double the amount of finish coats since the wood absorbs the first two coats.  It's a little extra work, but totally worth taking the time to prime your work.  For top coat, I'm currently using Lowe's Olympic "All About Olive" flat exterior latex.  It's not as dark as I would like, but is currently the best I can find where I'm at.  Once the paint dries, I stencil the sides with basic craft store white acrylic paint and a foam brush.  Once that's done, I drill and countersink holes on the lid where the lid screws would have been if this was an actual issued cartridge box.  The last bit I add is I stencil my regiment, company, and line number identification on the box to identify it as mine.  Personal stenciling is so over looked in this hobby it's incredible.  Every manual says each company should have it's own stenciling kit for marking their equipment.  It would have been readily available and no one wants their stuff stolen.  To show the impact the screw holes and stencil make, I added it as a before and after in the slide show.  The inside Watervliet stencil came from Hammler's book.  Watervliet was actually producing Sharps rounds in 1862.
     For interior box finishing, I used Old Master's water-based spar urethane in semi-gloss applied with a foam brush.  I applied one coat, let dry, then sanded gently with some 000 steel wool before cleaning and applying a second coat.  Again, not period correct but we all know how dirty cleaning kits can get.  If you want period correct you can use shellac or just use BLO.  If you use shellac I would recommend at least 3 or 4 coats to build up a good layer of protection.  Hammler also mentions research that boxes were lined with a packing paper.  Though, through time none seem to remain with the originals
     If you've heard me rattle on about fasteners on our YouTube channel, you might notice these pictures have Phillips head screws on the mortised hinges.  They won't be there for long.  I have to drive quite a ways to my hardware store to find the slotted screws I need so they'll be on this weekend.
civilwarstencil.pdf
File Size: 99 kb
File Type: pdf
Download File

2 Comments

The Essential Sharps Cleaning Kit

6/29/2015

3 Comments

 
PictureClean Sharps Expected. Awesome mustache optional.
In Company D, we work hard towards historical authenticity but when it comes to rifle care we use all modern rifle care can give us.  If our rifles only cost $42 as they did in 1861 then it might be easier to use period tools and methods only.  Unfortunately, they cost much more than that and we care for our investments as best as possible.

Cleaning Kit suggestions and reviews:

Cleaning Rod, Jag, Brush, bore guide, and swab: My personal preference is Kleen Bore.  If you use a shotgun Kleen Bore kit, a 28 gauge brush fits nicely into the .54 cal Sharps.
Bore Butter: Seasons and lubricates all your metal.
Ballistol:  When it comes to cleaning black powder rifles this cleaning agent is nothing short of amazing.  If you buy one solvent for your kit, buy Ballistol.
Hydrogen Peroxide: This inexpensive cleaner eats black powder from the hardest to reach places.  I like to soak my block in it after a reenactment.  Caution:  Use before you season the metal.  Hydrogen peroxide will speed up rusting if left untreated.
Blue Wonder:  This is my favorite gun cleaning product.  This removes rust instantly!
Q Tips: Great for cleaning bolt holes and other hard to reach places.
Pipe Cleaners:  Another tool for getting hard to reach places.  My favorite are the ones with metal bristles.
Metal picks: Digging build up out of blocks.
Dental picks: For the hard to reach places.
Welding files : Great for getting build up off of cones.
 
Remington Oil or  Mineral Oil:  Many of you use rifle socks rather than hard cases and routinely suffer from surface rust.  For long term storage or exposure to the environment spray liberally with a protective oil prior to long term storage.  Not recommended for immediate use as too much oil will cause excess fouling or dampen powder.
Anti-Seize: Keeps bolt threads from rusting solid.
Phosphor Bronze  Brush: Use carefully to remove tough build up.
Super Lube:  Not all lubricants are the same!  Petroleum based lubes will seize a block quickly.  The thinnest layer of Super Lube will provide a smooth, non-fouling lubrication to blocks.
Wheeler Gunsmith Screwdriver Set: Only about $35 this kit will prevent damage to screw heads.  Proper screwdriver size is too often overlooked.  While you may not have the money for a gunsmith kit, inexpensive multi-bit sets are also available. 
T/C Foaming Bore Cleaner: This product works quite well for a good field clean but does not work equally well on all Sharps rifles.
Can of Compressed Air:  You can find these in just about every electronics section.  I like the small ones from Office Depot the best mostly because they don't take up as much space as the big ones you often find.  These are indispensable for blasting blockages or residue out of your block.  Give it a try you'll be amazed!

Other notes:


  1. Always boil your rifle barrel and block for proper seasoning and smooth action.  DO NOT USE COLD WATER.  Boiling water dries immediately and opens the pores of the metal to absorb the bore butter for a deep and long lasting seasoning.  If you can hold your barrel with a bare hand it is not hot enough!
  2. Always, always, always fully breakdown your block and especially remove your clean out screw.
  3. Did you know your gas check tube should slide freely?
  4. Does your rifle have a worn or missing part? Replace it now!  Call or visit VTI Gun Parts.
  5. Don't be afraid to do a complete breakdown and thorough cleaning at home.
  6. Use an air compressor or CO2 blaster to clean oil and lubricants out of your block after cleaning.


3 Comments

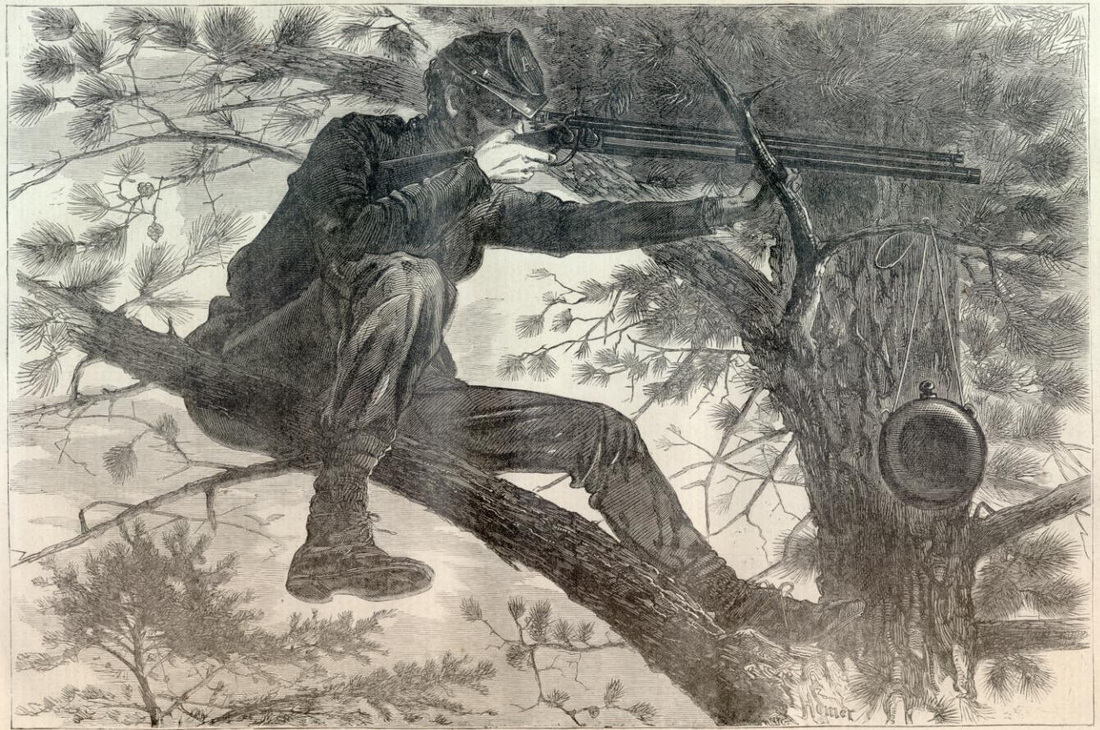
Target Rifle Close Up Nov. 15, 1862

9/18/2014

0 Comments

 
Picture
0 Comments

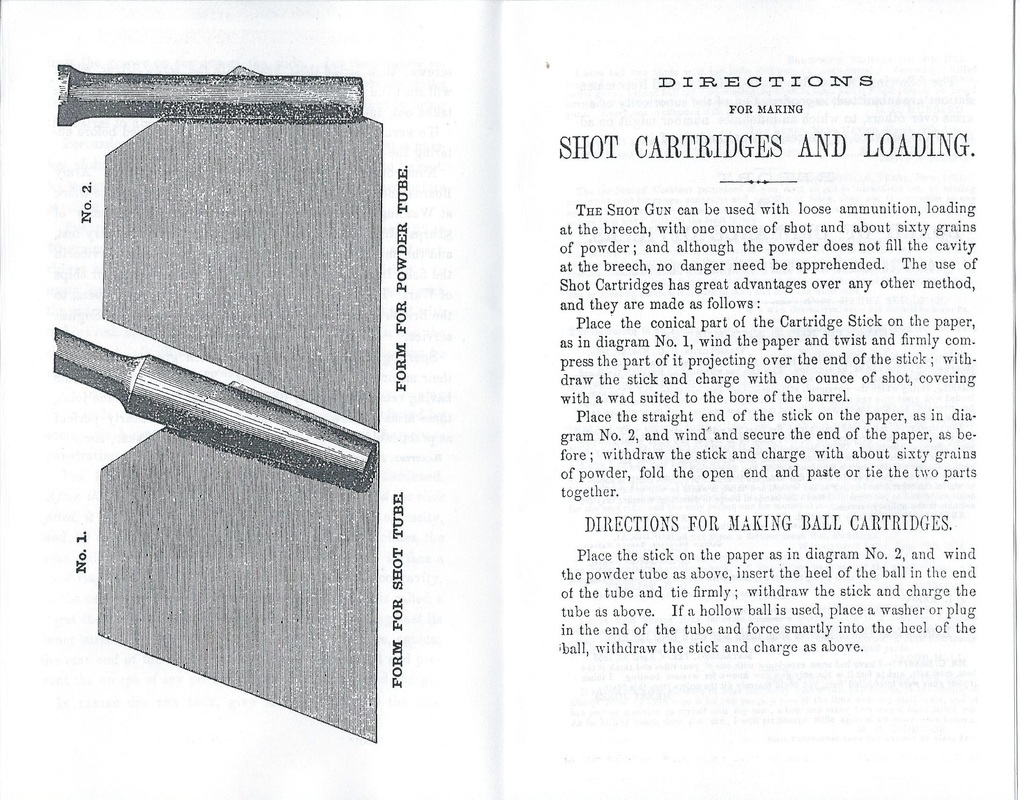
Sharps cartridge how-to from 1859 catalog

9/11/2014

0 Comments

 
Picture
0 Comments

Why Thorough Cleaning Is Important

8/27/2014

0 Comments

 
Picture
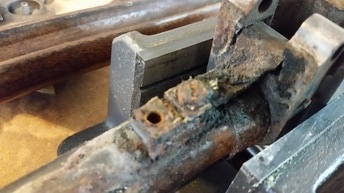
This is what can happen when rifles are not properly cared for.  In the interest of time and necessity, quick field cleaning is fine for reenactments.  However, for long term care everyone's rifle should be thoroughly broken down and cleaned once you get home.  I recommend the most stringent cleaning at the end of the year when our rifles go into long term storage.  Cake on the bore butter and treat the stock and other parts with a nice gun oil or mineral oil.  Before the first event of the succeeding year wipe the rifle and bore with a dry towel and swab for smooth action.

Also, the off season is a great time to purchase or replace missing, worn, or damaged parts.  VTI gun parts has an amazing selection, great service, and if they don't have your part, they'll tell you who does.

Not confident in repairs?  Email me or others in the unit who will be happy to help you keep your Sharps in tip top condition!

0 Comments
Forward>>
    Useful Files and Links

    Template Sheet for 1859 Live Rounds from original manual.
Proudly powered by Weebly